Wednesday, December 28, 2011

How to change paypal button image in magento...

Don't even bother finding the solution at Magento Admin Panel or at PayPal :), spent quit a time looking for the solution over there.

Steps

  1. You need to access the file (using ftp...) located here:
    1. /app/design/frontend/base/default/template/paypal/express/shortcut.phtml
  2. Edit it:
    1. find the line that contains "img src=".
    2. replace the source with your wanted 'Pay with PayPal' image path.
Results
I've managed to change it from this one:

To this one:


Resources

Using PayPal express with magento.

The story
I was asked to give the user the ability to pay using PayPal services.
The site is magento store.
The user will have two option at PayPal:

  1. He have an acount and will pay after he logged into his PayPal account.
  2. He have no account - he is NOT requiered to open a PayPal account to pay, he'll enter his credit credentiols and pay.
Simple, right? :-)

I got into some problems, the community help on this matter is not so obvious, after a day of research and experements, which hopefuly you will avoid,  here are the final steps did to satisfy these requierments:


The solution
On Magento Admin Panel
 
  • Magento admin panel => Menu => System => Configuration, click.
  • In the left configuration panel => Sales => PayPal, click.
  • "Email Associated with PayPal Merchant Account" => enter your PayPal account email.
  • "Select a PayPal Solution" => "Express Checkout", checked
  • At "Express Checkout Settings" (*2):
    • "Payment Action" : Usually Sale .
    • "Enable PayPal Guest Checkout" => Yes
    • SAVE CONIFG!
  • At "API/Integration Settings":
    • API Authentication Methods => API Signiture.
    • Get Credentials from PayPal, click:
      • Entering PayPay... Enter your PayPal credential...
      • Just get your API credentials through Profile > My selling tools > API Access > Update > Request API credentials > Request API Signature (*1)
    • Enter the API credentioal, appropriattly, to:
      • API Username, Password & Signature.
    • SAVE CONIFG!
These steps created a fast & secure checout point for my users to buy products without PayPay account.

Hope it helped.

Resources

Saturday, December 24, 2011

MAGENTO: can't "Log in to Admin Panel"

Just solved this problem.

Problem description
I've instaled magento in my local computer and I can't login to the admin panel.

Understanding the problem
Magento doesn't work well with 'localhost' and '127.0.0.1'. After some readings on the net I understood that these addresses won't allow cookies, resolting in admin panel login failure.

Solution
Edit 'host' file located at 'C:\Windows\System32\drivers\etc'.
Add a new line, for example:
127.0.0.1 shloemi.com # Localhost virtual development site.

Usage
You can now acces magento admin pannel using the site shloemi.com.
Example: http://shloemi.com/Magento/index.php/

WPF: layouts & layout attributes explained.

Found some very good articles that explains layouts & layout attributes...

Alignment, Margins, and Padding Overview

WPF controls layout explained
http://www.aspfree.com/c/a/Windows-Scripting/WPF-Control-Layout/

Using the WPF DockPanel http://blogs.objectsharp.com/blogs/dave/archive/2009/03/13/using-the-wpf-dockpanel.aspx

Visual Studio Developer Center > Samples

FYI - samles for VSxxx (2010, 2008...).

WPF: MVVM, Quickstart

Read and follow this GREAT article instructions...
http://www.codeproject.com/KB/WPF/WpfMvvmQuickStart.aspx

Background reading that helps

Useful resources


Sunday, December 11, 2011

WPF CodePlex toolkit, charting made easy...

Charting made easy: graph, pie, bars, points... 
Free, opensource, maintained.


"The WPF Toolkit is a collection of WPF features and components that are being made available outside of the normal .NET Framework ship cycle."


Sources

Saturday, December 10, 2011

MSConfig - System Configuration UI


Very helpfull tool.


(*1) "Some of its functionality varies by Windows versions:

  • In Windows 98 and Windows Me, it can configure advanced troubleshooting settings pertaining to these operating systems. It can also launch common system tools.
  • In Windows 98, it can back up and restore startup files.
  • In Windows Me, it has also been updated with three new tabs called "Static VxDs", "Environment" and "International". The Static VxDs tab allows users to enable or disable static virtual device drivers to be loaded at startup, the Environment tab allows users to enable or disable environment variables, and the International tab allows users to set international language keyboard layout settings that were formerly set via the real-mode MS-DOS configuration files. A "Cleanup" button on the "Startup" tab allows cleaning up invalid or deleted startup entries.
  • In Windows Me and Windows XP versions, it can restore an individual file from the original Windows installation set.
  • On Windows NT-based operating systems prior to Windows Vista, it can set various BOOT.INI switches.
  • In Windows XP and Windows Vista, it can hide all operating system services for troubleshooting.
  • In Windows Vista and later, the tool gained additional support for launching a variety of tools, such as system information, other configuration areas, such as Internet options, and the ability to enable/disable UAC. An update is available for Windows XP and Windows Server 2003 that adds the Tools tab.[1] It also allows configuring various switches for Windows Boot Manager and Boot Configuration Data."


Read more about it here - http://en.wikipedia.org/wiki/MSConfig

To activate it, WIN+R (or Start-->Run), then run 'msconfig'.

Result

Resources

Friday, December 9, 2011

WPF: FlowDocument control

Please be aware FlowDocument control in WPF, this can easy your life when needed.

Pictures that say it all


The diagram shows the objects most typically used with flow content.


Sources

WPF XAML example: Binding FontSize to a Slider

Code snippet

Code Snippet
  1. <TextBlock Text="Hi there." FontSize="{Binding ElementName=mySlider, Path=Value}" />
  2. <Slider Minimum="8" Maximum="32" x:Name="mySlider" Value="12" />


Result

WPF XAML example: Rich texted ToolTip with italic, color and more...

Example
In this example I'll demonstrate how to add a ToolTip to a TextBox.
The ToolTip should be colored and italic.

Code snippet

Code Snippet
  1. <TextBox x:Name="SampleText"
  2.     TextWrapping="Wrap">
  3.     
  4.     <TextBox.ToolTip>
  5.         <TextBlock>
  6.             <Italic Foreground="Red">Instructions: </Italic> Type here to change the preview text.
  7.         </TextBlock>
  8.     </TextBox.ToolTip>
  9.     
  10.     The quick brown fox jumps over the lazy dog.
  11. </TextBox>


Result


Sources

WPF XAML TIP: Label with Target + Control composition == Hotkey control

Code snippet

Code Snippet
  1. <Border DockPanel.Dock="Top">
  2.     <StackPanel>
  3.         <Label
  4.             Content="_Last Name:"
  5.             Target="{Binding ElementName=lastName}" />
  6.         <TextBox x:Name="lastName" Width="100" HorizontalAlignment="Left"/>
  7.     </StackPanel>
  8. </Border>


Usage 
Press ALT+L to focus the TextBox control 'lastName'.

Result

WPF: TextBox with SpellCheck and ToolTip XAML example

Code snippet

Code Snippet
  1. <TextBox
  2.     Width="200"
  3.     SpellCheck.IsEnabled="True"
  4.     ToolTip="Tips for this input-box here..." />


Results

WPF: Rich TextBlock XAML example

"The TextBlock was designed specifically for the purpose of showing small amounts of flowing rich text to the user.
It is the perfect element for displaying instructions or summary information."


Usage example
I have a program that users can communicate with each other. I wish to add the feature of bold, colored, line-breaking and icons to that chat.

Here is an example I've found to illustrate it:


Example
Code Snippet
  1. <TextBlock FontSize="10" TextWrapping="Wrap" >
  2.     <Image Stretch="UniformToFill" Width="32" Height="32" Source="http://upload.wikimedia.org/wikipedia/en/b/b0/Avatar-Teaser-Poster.jpg" Margin="2 2 2 2" />
  3.                     <Bold><Italic FontSize="12" Foreground="DarkGreen">ShloEmi:</Italic></Bold><LineBreak />
  4.     <Bold><Italic FontSize="14" Foreground="BlueViolet">H</Italic></Bold>ave  fun with <Bold>TextBlock's</Bold>.<LineBreak />
  5.     <AccessText Foreground="Blue">It's easy when you have an example </AccessText> <Image Source="http://upload.wikimedia.org/wikipedia/commons/thumb/8/85/Smiley.svg/50px-Smiley.svg.png" Width="16" Height="16"></Image>
  6. </TextBlock>

Result


Have fun...

Thursday, December 8, 2011

About WPF

Here is my experiance with learning and programming WPF in the last year:

First let me tell you that - WPF IS GREAT!
Simple put - WPF let you do layers of controls and decorators.
This means you can composite anything in easy.
The things I did with WPF were not easy at all in Win32-API and not even in .Net using GDI+.


Let's start with a complext WPF sample I've found:
http://10rem.net/blog/2010/10/28/the-present-and-future-of-wpf


Usage example

I wish to have a character drawn, later on I wish to add that character a life status, later on - an icon on the top-right to reperesent which guild is he in... and more...

Of course It's solvable using the Decorator-Pattern using the draw to add more pictures, but - you need to BitBlt ... and more complex stuff.

With WPF, however, you layer it all with opacity, or transparency, which is the same solution as before with one exception - you write it declarativly and in 10 min :-).

The learning curve

I already had a very rich epreriance with WinForms/MFC/Win32 GUI + I know Design-Patterns pretty good, so I had a good head-start ==> It was easier to learn, the elements were already in my mind.


First I started with tutorials to feel WPF, and books.
The most used were (recomendation ordered):
  1. Tutorials:
    1. WPF Tutorial
    2. 'Hello WPF' ... http://www.wpftutorial.net/HelloWPF.html
  2. Books:
    1. http://www.amazon.com/Sams-Teach-Yourself-WPF-Hours/dp/0672329859
    2. http://www.amazon.com/2010-NET-Platform-Andrew-Troelsen/dp/1430225491
      1. The chapters about WPF (Chapter 27).

In between, I started using it in my solutions, strted with simple solutions (traditional GUI programming), used the known and common parts (buttons, labels, textboxes...), practiced and learned the basics.

Bottom line 
After touching WPF there is no going back, I'll always prefer WPF over other solutions, unless I have no choice, like - "the OS doesn't support DirectX 9" :-(.


Have a good and productive learning - WPF worth it!

Resources

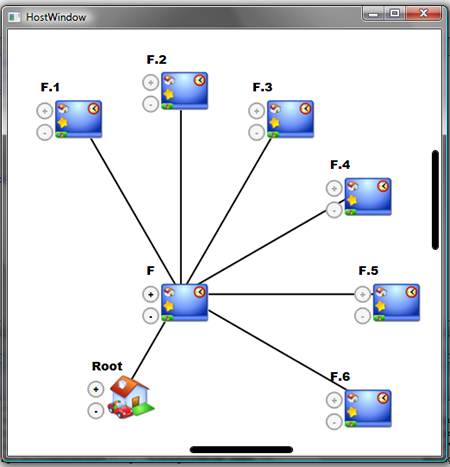
WPF: Radial Panel, custom panel

Here is a cool 'custom panel' I've found that might be very handy...
The Joy Of Programming: A Simple Radial Panel for WPF and SilverLight

Usage examples
Nicer selection menu, Clock digits, dynamic elements in radial presentation rather than list...

Example outputs

source - http://www.codeproject.com/KB/WPF/SpiderControl.aspx

WPF: Bulletdecorator XAML example

BulletDecorator is basically like any editor bullet (like MS word's bullet). You can specify how to draw the bullet itself and decorate what ever you need.

Suppose we want to do the following effect in WPF:

  • This is a bullet
Here is the source for it:
Code Snippet
  1. <BulletDecorator>
  2.     <BulletDecorator.Bullet>
  3.         <Polygon Margin=" 2, 0, 0, 0" Points="0, 5 5, 0 10, 5 5, 10" Fill=" Blue" />
  4.     </BulletDecorator.Bullet>
  5.     <TextBlock Margin="10, 0, 0, 0" Text="This is a bullet" />
  6. </BulletDecorator>


And here is the results:


Source - Bulletdecorator in WPF | Controls | w3mentor

Wednesday, December 7, 2011

TUTORIAL: VS - Creating Code Snippets - CodeProject

I was in the middle of creating my experiance/article about the snippets subject when I got an email from http://www.codeproject.com/ with this wonderful article.

Extending Visual Studio Part 1 - Creating Code Snippets - CodeProject

I've already created some snippets, feel free to use them:

'Decorator-Pattern' snippet (activation: dp_decorator + TAB):
Code Snippet
  1. xml version="1.0" encoding="utf-8" ?>
  2. <CodeSnippetsxmlns="http://schemas.microsoft.com/VisualStudio/2005/CodeSnippet">
  3. <CodeSnippet Format="1.0.0">
  4. <Header>
  5. <Title>Decorator DPTitle>
  6. <Shortcut>dp_decoratorShortcut>
  7. <Description>Code snippet for decorator design patternDescription>
  8. <Author>S.OAuthor>
  9. <SnippetTypes>
  10. <SnippetType>ExpansionSnippetType>
  11. SnippetTypes>
  12. Header>
  13. <Snippet>
  14. <Declarations>
  15. <Literal>
  16. <ID>ComponentID>
  17. <ToolTip>Component nameToolTip>
  18. <Default>ComponentDefault>
  19. Literal>
  20. <Literal>
  21. <ID>DecoratorID>
  22. <ToolTip>Decorator nameToolTip>
  23. <Default>DecoratorDefault>
  24. Literal>
  25. Declarations>
  26. <Code Language="csharp">
  27. // Decorator patern:
  28. // http://en.wikipedia.org/wiki/Decorator_pattern#Structure
  29. // http://www.dofactory.com/Patterns/PatternDecorator.aspx
  30. abstract class $Component$
  31. {
  32. public abstract void Operation();
  33. }
  34. abstract class $Decorator$ : $Component$
  35. {
  36. protected $Component$ _$Component$;
  37. public void SetComponent($Component$ component)
  38. {
  39. this._$Component$ = component;
  40. }
  41. public override void Operation()
  42. {
  43. if (_$Component$ != null)
  44. {
  45. _$Component$.Operation();
  46. // + [your operation here]
  47. }
  48. }
  49. }
  50. $end$
  51. ]]>
  52. Code>
  53. Snippet>
  54. CodeSnippet>
  55. CodeSnippets>

The 'Event changed property' snippet (eprop + TAB):
Code Snippet
  1. xml version="1.0" encoding="utf-8" ?>
  2. <CodeSnippetsxmlns="http://schemas.microsoft.com/VisualStudio/2005/CodeSnippet">
  3. <CodeSnippet Format="1.0.0">
  4. <Header>
  5. <Title>event changed propertyTitle>
  6. <Shortcut>epropShortcut>
  7. <Description>Code snippet for eprop...Description>
  8. <Author>SOAuthor>
  9. <SnippetTypes>
  10. <SnippetType>ExpansionSnippetType>
  11. SnippetTypes>
  12. Header>
  13. <Snippet>
  14. <Declarations>
  15. <Literal Editable="true">
  16. <ID>prop_nameID>
  17. <ToolTip>property nameToolTip>
  18. <Function>PropName()Function>
  19. <Default>PropNameDefault>
  20. Literal>
  21. <Literal Editable="true">
  22. <ID>prop_typeID>
  23. <ToolTip>property typeToolTip>
  24. <Function>PropType()Function>
  25. <Default>ObjectDefault>
  26. Literal>
  27. Declarations>
  28. <Code Language="csharp">
  29. #region $prop_name$
  30. ///
  31. /// Occurs when $prop_name$ changes.
  32. ///
  33. public event EventHandler $prop_name$Changed;
  34. ///
  35. /// Raises the event.
  36. ///
  37. /// The instance containing the event data.
  38. protected virtual void On$prop_name$Changed(EventArgs e)
  39. {
  40. if ($prop_name$Changed != null)
  41. $prop_name$Changed(this, e);
  42. }
  43. private $prop_type$ _$prop_name$ = null;$end$
  44. ///
  45. /// Gets or sets the type of the region.
  46. ///
  47. ///
  48. /// The type of the region.
  49. ///
  50. public $prop_type$ $prop_name$
  51. {
  52. get { return _$prop_name$; }
  53. set
  54. {
  55. if (_$prop_name$ != value)
  56. {
  57. _$prop_name$ = value;
  58. On$prop_name$Changed(new EventArgs());
  59. }
  60. }
  61. }
  62. #endregion
  63. ]]>
  64. Code>
  65. Snippet>
  66. CodeSnippet>
  67. CodeSnippets>

And the 'TODO' snippet (TD + TAB), need some polish like auto date/time stamp, priority...:
Code Snippet
  1. xml version="1.0" encoding="utf-8" ?>
  2. <CodeSnippetsxmlns="http://schemas.microsoft.com/VisualStudio/2005/CodeSnippet">
  3. <CodeSnippet Format="1.0.0">
  4. <Header>
  5. <Title>TODOTitle>
  6. <Shortcut>TDShortcut>
  7. <Description>Code snippet for TODO...Description>
  8. <Author>SOAuthor>
  9. <SnippetTypes>
  10. <SnippetType>ExpansionSnippetType>
  11. SnippetTypes>
  12. Header>
  13. <Snippet>
  14. <Declarations>
  15. Declarations>
  16. <Code Language="csharp">// TODO:P, TimeStamp, S.O: $end$]]>
  17. Code>
  18. Snippet>
  19. CodeSnippet>
  20. CodeSnippets>

My advice: if you already created a code pattern twice (meaning - you copied and pasted a code and renamed some variables and function/property names), add it to your snippets, you'll need it and it will save time.

REMARK: Please follow the codeproject artical if you wish to install/use them...


Tuesday, December 6, 2011

TIP: Creating a file, fast, with incremental values (using FOR /L).

I needed to create a file (called urls.txt) that contains lots of image urls, here is the solution:


  1. Create a batch file (I'll call it gget.bat).
  2. copy and paste the following to gget.bat file.

REM ~~~~~ gget.bat file content ~~~~~~~~~~~~~~~

@echo off
for /L %%a in (0,1,1984) do (
echo http://domain.com/images/%%a.jpg >>c:\urls.txt
)

ECHO DONE!
pause
REM ~~~~~ gget.bat file content ~~~~~~~~~~~~~~~


  1. change the numbers in "(0,1,1984)" to the desired ones (please read more about 'FOR /L' here.).
the result is a file 'c:\urls.txt' that contains this:

http://domain.com/images//0.jpg 
http://domain.com/images//1.jpg 
http://domain.com/images//2.jpg 
http://domain.com/images//3.jpg 
...
http://domain.com/images//1983.jpg 
http://domain.com/images//1984.jpg 

Hope it helps...

Monday, December 5, 2011

TIP - How to check an errorlevel of a program...

First understand a little about error levels... Batch files - Errorlevels:

Next... Write this code the a batch file and run it (change the runme.exe to the program that you wish to check the error-level).
#~~~~~~~~~~~~~~~~~~~~~~~~~
runme.exe
ECHO.%ERRORLEVEL%
PAUSE
#~~~~~~~~~~~~~~~~~~~~~~~~~

Hope it helps...